Cheap vs expensive spray paint: what you actually get when you pay more
The cheapest spray paint at Home Depot is around $4 a can. A premium Montana Gold or Tamiya TS is $12–18. A 2K activator-based automotive aerosol like SprayMax is $35. Same can shape, same general idea, wildly different finished results — and the price tag doesn’t tell you why. This guide walks through exactly what you’re paying for, what gets noticeably better at each tier, and when “cheaper” is the right call.
TL;DR: Cheap spray paint cuts costs on pigment load, binder quality, nozzle precision, and propellant ratio. You’ll notice it as more coats needed, drippier control, faster fading, and a nozzle that clogs or splatters. Spend up when the finish is going to be visible, handled, or outdoors. For a one-coat utility paint job that nobody will look closely at, the $4 can is fine.
What’s Actually in the Can
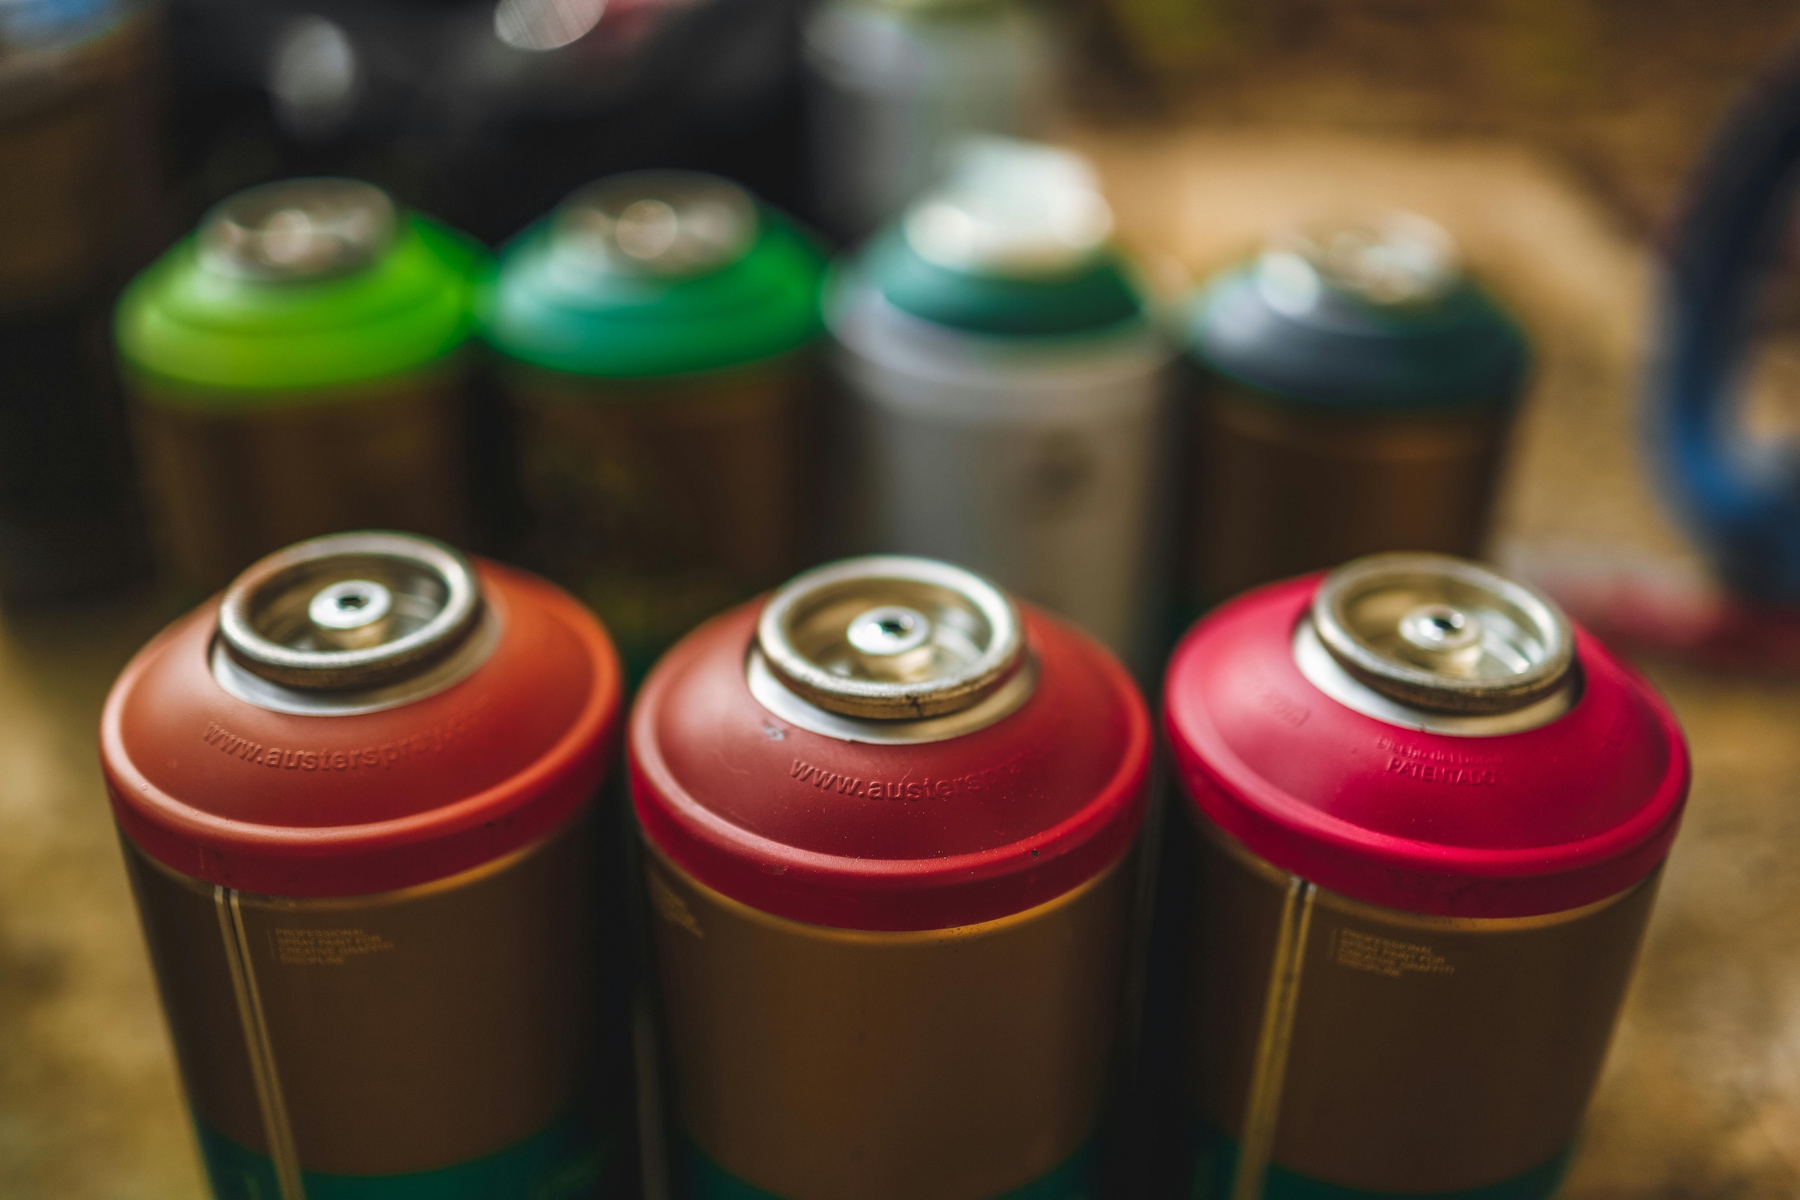
Every aerosol can has the same five ingredients: pigment, binder (the resin that makes pigment stick), solvent (carries everything to the surface), propellant (pushes paint out), and the nozzle/valve assembly that turns it all into a spray pattern. Cheap and expensive cans differ in every one of those five elements.
1. Pigment quality and load
This is the single biggest source of price difference. Higher-grade pigments are finer particles (sub-micron vs. multi-micron), more saturated, and more lightfast. Cheap paint stretches a small amount of weak pigment with extenders like clay, silica, and talc — fillers that take up volume without adding hide or color. The result: you can see your primer coat through one pass of the budget paint. The premium paint hides in one coat because there’s actually enough pigment per milliliter of carrier to do the job.
The other half of pigment quality is lightfastness. Cheap reds and yellows fade dramatically in a single summer of UV exposure. Premium paints use UV-stable pigment chemistry (cadmium replacements, inorganic oxides, encapsulated organics) that holds color for years.
2. Binder quality
The binder is the resin that hardens around the pigment after the solvent flashes off. Cheap binders are weaker — chip easily, scratch easily, and don’t flex with the substrate. Premium acrylics, lacquers, and 2K urethanes form much tougher cured films. You feel this difference the first time you drop a part painted with each.
3. Propellant ratio
Cheap cans skimp on propellant. As the can empties, the spray pattern gets weaker, sputtering starts earlier, and the last 20% of the can is often unusable. Premium cans hold pressure all the way down — a Montana Gold sprays the last gram the same as the first.
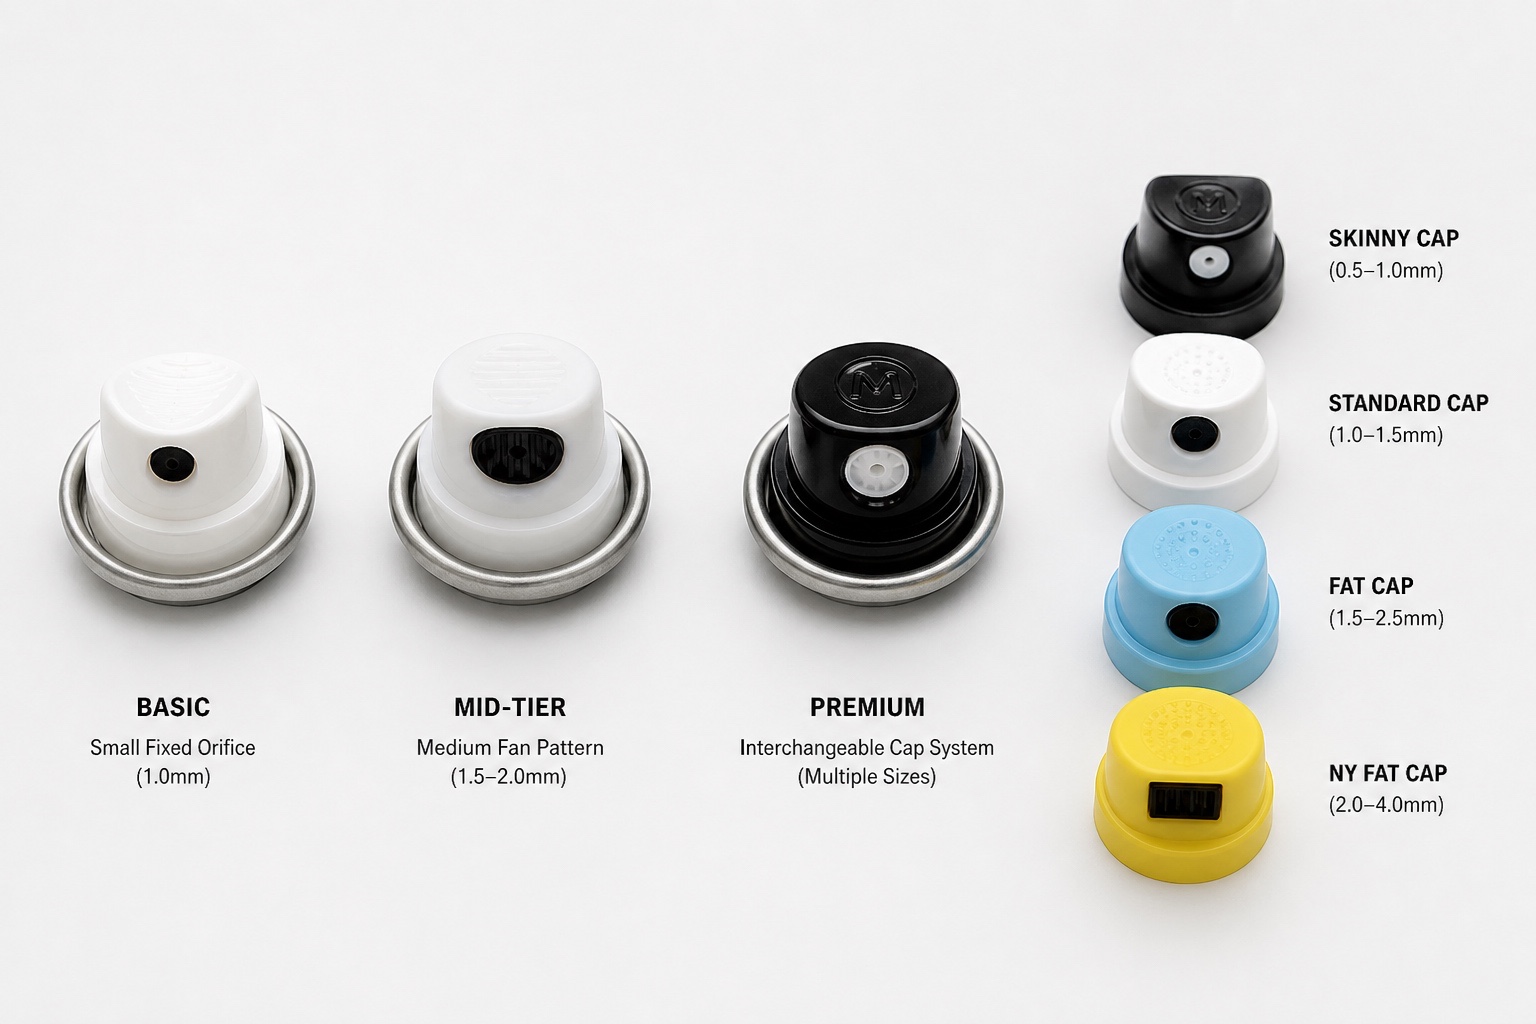
4. Nozzle quality and selection
This is the most underrated difference. Hardware-store cans use one fixed nozzle with a basic round fan pattern. Premium cans (Montana, MTN, Molotow) ship with a default nozzle and let you swap in specialty caps — fat caps for big coverage, skinny caps for fine lines, fan caps for billboard-flat finishes. A graffiti or model-airbrush enthusiast spends as much time choosing nozzles as choosing color.
Beyond cap selection, the nozzle’s internal valve matters. Cheap valves clog quickly (a half-second of paint dry-back inside the orifice ruins the next spray). Premium valves are designed for thousands of triggers without splatter, drips, or pattern collapse.
5. Color accuracy and lot consistency
If you spray-paint a fence today and need to touch up six months later, cheap brands often have visibly different color across cans of the “same” color from different manufacturing batches. Premium brands batch-test for color matching against a master standard, so a Montana Shock Red bought today matches one bought last year.
The Real Price Tiers (And What Each One Buys)
Tier 1 — Budget (~$3–6 per 12oz can)
Examples: Color Place (Walmart), ACE Premium Enamel, Rust-Oleum Painter’s Touch, Krylon ColorMaster (basic line).
What you get: a plain enamel or acrylic in a single nozzle configuration. Coverage is usable but thin — expect 2–3 coats for full hide on a contrasting primer. Fan pattern is small and round. Propellant runs out before the can does. UV resistance is poor; expect noticeable fading in 6–12 months outdoors. Drip control depends entirely on your technique because the nozzle has none.
When this tier is the right call:
- Touch-ups on already-painted projects nobody will scrutinize
- Garage-utility projects (shop hooks, pegboard, etc.)
- Test colors before committing to a premium can
- Kids’ craft projects where the paint will be abused anyway
Tier 2 — Mid (~$7–12 per can)
Examples: Rust-Oleum Stops Rust / 2X Ultra Cover, Krylon Fusion All-In-One, Krylon ColorMaxx Premium.
The mainstream sweet spot. Real binder upgrades (Rust-Oleum’s oil-based “Stops Rust” is genuinely rust-inhibitive; Krylon Fusion bonds to plastic without primer), better pigment density, and a nozzle that doesn’t clog after one pass. Most weekend DIY paint jobs live in this tier. Coverage is generally 1.5–2 coats for full hide, and the cured film holds up to outdoor exposure for years instead of months.
Rust-Oleum Stops Rust Spray
The household-name rust enamel for tools, hardware, lawn equipment, and general metal touch-ups. Oil-based for genuine rust inhibition, durable cured film, fan pattern wider than budget cans. Workhorse for the price.
See on AmazonKrylon Fusion All-In-One
Bonds directly to plastic — patio chairs, planters, PLA 3D prints — without a separate primer step. Water-based, low-VOC, cleans up with soap. Saves a coat of primer, which often makes it cheaper-per-job than budget paint.
See on AmazonTier 3 — Hobby / Scale Modeler (~$10–18 per can)
Examples: Tamiya TS / AS series, Testors Model Master Lacquer, Mr. Hobby Mr. Color Spray, AK Real Colors aerosol.
Made for scale models where finish quality is the entire point. Pigments are finer and more saturated than mid-tier cans. Lacquer-based (Tamiya TS, Mr. Color) bonds chemically to ABS and styrene plastic — much tougher than acrylic on RC bodies, gunpla, and cosplay. The smaller cans (typically 100ml) are sized for small-area precision rather than coverage volume, so the price-per-can looks high but the price-per-finished-model often beats hardware-store cans because there’s less waste.
Tamiya Fine Surface Primer (Spray)
Industry-reference primer for scale modelers. Ultra-fine pigment that doesn’t fill panel lines or rivet detail. Lacquer-based — bonds chemically to ABS and styrene. Pair with the Tamiya TS color line for a unified finish system that looks injection-molded.
See on AmazonTier 4 — Pro / Artist Aerosol (~$12–20 per can)
Examples: Montana Gold, Montana Black, MTN 94, Molotow Premium, Ironlak.
The graffiti-and-fine-art tier. Designed around control: interchangeable cap systems, very high pigment loads, glass-marble agitator that mixes the can audibly when shaken (cheap cans skip the marble or use plastic ones that thunk). Largest fan-pattern range, smoothest finish, lowest drip rate. Nitrocellulose-acrylic (“NC-Acrylic”) chemistry on Montana Gold dries to a softer film than Rust-Oleum enamel — a feature for layering technique, a bug if the part takes physical abuse without a clear topcoat.
You don’t need this tier for a fence or a tool box. You absolutely want it for: large flat surfaces where lap marks ruin the look, anything with custom multi-color work, props that need photo-quality finishes.
Montana Gold Acrylic 400ml
220+ colors with batch-tested color consistency. Glass-marble mixer, swap-in caps (Skinny, Standard, Fat, NY Fat), and the smoothest fan pattern on the market. Used by professional muralists and prop builders. Topcoat with 2K clear if the surface gets handled.
See on Montana CansTier 5 — 2K Automotive Aerosol (~$30–50 per can)
Examples: SprayMax 2K Clear, Eastwood 2K AeroSpray, U-POL Raptor 2K.
A different category entirely. These cans have a separate activator (hardener) chamber that you trigger before use — once activated, the can has a 24–48 hour pot life and then it’s done. The finished film is genuine 2-part urethane: gas-resistant, scratch-resistant, UV-stable for years, identical chemistry to professional automotive paint. The price is high and the can is single-use, but for headlight clear coats, motorcycle parts, and anything that needs car-paint-grade durability, nothing else aerosol-based competes.
What You’ll Actually Notice in Use
Side-by-side, here’s what shows up across price tiers:
Coverage and number of coats
- Budget: 3+ coats over contrasting primer. White paint over black primer is a disaster scenario — sometimes 5 coats and still patchy.
- Mid: 2 coats over most primers, 1 coat over a matched-color base.
- Hobby/Pro: 1–2 thin coats over primer, often 1 thin coat for a tinted touch-up.
- 2K Auto: 2 medium coats and you’re done permanently.
Drips and runs
The nozzle and pigment combination determines this more than your technique. A budget can with thin pigment in a heavy carrier is physically harder to apply without runs because the carrier wants to flow. A premium can lays down dry enough to grab the surface immediately, then flows just enough to level smooth. Same person, same distance, same overlap pattern, very different results.
Orange peel and surface texture
Orange peel happens when paint droplets dry mid-flight and hit the surface as half-dry beads instead of a wet film that levels. Cheap cans amplify this in three ways:
- Solvent ratio is set for cheap chemistry, not for the substrate
- Nozzle orifice size produces larger droplets that fly further before flowing
- Wide-fan pattern at typical 8-inch distance over-atomizes
Premium cans hit the surface wet and level smooth. The same paint job that looks textured in budget red can look glass-smooth in Montana red. Orange peel can be sanded out, but only after the finish fully cures — and then you’ve added a sanding-and-clear step that costs more than buying the better paint to begin with.
Drying time and recoat windows
- Budget enamels: Touch-dry in 30–60 min, hard-dry in 24h, fully cured in 2–7 days.
- Mid-tier: Touch-dry in 20 min, hard-dry overnight.
- Lacquer (hobby): Touch-dry in 5–15 min, recoat-able in 30 min, fully cured in 24h.
- Acrylic-NC (Pro/Artist): Touch-dry in 10 min, recoat any time during the project.
- 2K urethane: Touch-dry in 20 min, fully cured in 24h, and chemically resistant from then on — no soft uncured period.
UV / fade resistance
Outdoor reds and yellows are the truth-tellers. A budget can red on a fence will go to pink-orange in a single summer in direct sun. A Montana red holds. A 2K-urethane red holds for years. If the project lives outdoors and color matters, this single factor is often worth a tier upgrade by itself.
Can pressure consistency
A premium can sprays the last 5g the same as the first. A budget can starts spitting at 70% empty and is dribbling by 90%. If you’re working a large surface and burn through cans quickly, the lost final percentage of every can adds up — sometimes enough that mid-tier cans cost less per usable gram than budget.
The Reference Table
| Tier | Price/can | Pigment quality | Nozzle / caps | Coverage | Outdoor durability | Best for |
|---|---|---|---|---|---|---|
| Budget | $3–6 | Low (extenders) | One fixed nozzle | 3+ coats | 6–12 mo. | Touch-ups, garage utility, kids’ crafts |
| Mid | $7–12 | Decent | One nozzle, better valve | 2 coats | 2–5 years | Most weekend DIY jobs |
| Hobby | $10–18 | Fine, saturated | One nozzle (refined) | 1–2 thin coats | Indoor display | Scale models, 3D prints, RC bodies |
| Pro / Artist | $12–20 | High, lightfast | Interchangeable cap system | 1–2 coats | 5+ years | Murals, props, large flat surfaces |
| 2K Auto | $30–50 | Premium | Single-use, activator | 2 medium coats | 10+ years | Cars, motorcycles, headlights |
When Cheap Is Actually the Right Call
Don’t read this and assume premium is always better. Specific scenarios where the budget can wins:
- Color testing. Spraying a swatch on a hidden corner of a project to verify it’s the right red. A $4 can does this exactly as well as a $14 one.
- Indoor utility paint. Garage shelving, basement workshop pegboards, anything functional that nobody photographs.
- Disposable or short-lived projects. Halloween props, single-use stage scenery, bachelorette-party-prop nonsense.
- High-volume coverage on a budget. Painting an entire fence in solid white is going to consume a lot of cans no matter what; if Tier 2 looks the same to you as Tier 4 from the street, the math is obvious.
- Children’s craft projects. Crayola-tier washable craft paint or budget aerosol — the durability premium is wasted on something that’ll be repainted in a week.
When to Definitely Spend Up
- Large flat visible surfaces. Hood of a car, top of a coffee table — orange peel and lap marks ruin anything visible from above.
- Outdoor color jobs. Mailbox, fence accents, exterior shutter touch-ups. UV-fade ruins budget paint within months.
- Anything that gets handled. Phone cases, prop swords, drone bodies. Cured-film hardness matters when fingernails and pockets are involved.
- Scale models and 3D prints. Detail preservation is the entire job. Tier 1 paint kills detail.
- Color matching across cans. If you’re going to need to touch up later, lot consistency on premium brands is worth the markup.
- Anything photographed up close. Surface finish is the difference between “homemade” and “professional.”
The Cabinet Philosophy
A reasonable spray-paint stash for a working DIYer:
- Two budget cans of high-traffic colors (matte black, white) for utility work and color tests
- Three or four mid-tier cans in commonly-used colors (Rust-Oleum Stops Rust black, Krylon Fusion clear, Rust-Oleum 2X gray primer) for normal projects
- One artist-grade can of the color that matters most for your current project
- One 2K clear for the project where outdoor durability or chemical resistance matters
Total investment: $40–60. Saves probably 5x that in the cans you don’t waste trying to make budget paint do a job it can’t.
What This Doesn’t Cover
Two related-but-separate spray-paint topics worth knowing exist:
- Spray gun vs. aerosol can. This guide is about cans only. Once you’re using more than a few cans per project, an HVLP or airless gun is far cheaper per square foot — but the gear cost (gun + compressor or airless unit + paint mixing) starts at $200 and goes up.
- Brushed paints. Most of the same pigment-and-binder logic applies to brush-on cans (chalk paint, cabinet enamel, milk paint). The big difference is no nozzle to evaluate, and you re-introduce a different control variable (brush or roller skill).
For now: pick your tier based on the visibility, durability, and detail needs of the specific project. The $4 can isn’t bad and the $18 can isn’t snake oil — they’re optimized for very different jobs.
Sources:
- What is the difference between cheap and expensive paint? — Quora
- What’s the Difference Between Cheap Paint and High-Quality Paint? — Powercoat
- Krylon Vs. Rust-Oleum: A Spray Paint Showdown — Ralph’s Way
- Montana GOLD Spray Paint Product Page — Montana Cans
- How to Prevent Orange Peel Paint Spray — Fuji Spray
- Best Spray Paint for Art: Top 6 Paints Tested by Experts — Artsology
ThePickSmith participates in the Amazon Associates program. Purchases made through links on this page may earn us a commission at no extra cost to you. Product recommendations are based on independent research and not paid placements.