Painting 3D-printed parts: the filament-by-filament guide
The reason most painted 3D prints look bad after six months isn’t the paint — it’s the filament underneath rejecting it. Every plastic family (PLA, PETG, nylon, polycarbonate, resin, and the exotic composites) has a different surface energy, a different absorption profile, and a different set of paints that will actually bond to it. Pick wrong and you’ll watch your topcoat peel off in flakes the first time someone picks the print up. Pick right and the paint survives drops, sunlight, and years of handling.
This guide names specific primers and topcoats by filament type, walks through the surface prep that makes or breaks adhesion, and ends in a single reference table so you don’t have to re-read it each time you finish a print.
TL;DR: Wash every print first (IPA for resin, soap-and-water for FDM), light-sand to break the surface gloss, and prime before topcoat. Acrylic primer covers most filaments; nylon, polypropylene, and PEEK need a dedicated plastic-adhesion promoter or they’ll peel.
The Three Things That Decide Whether Paint Sticks
1. Surface energy
Every plastic has a measurable property called surface energy. High surface energy (PLA, ABS, resin, PETG) means paint wants to bond. Low surface energy (nylon, polypropylene, polycarbonate, PEEK) means paint physically can’t grip without help. This is why the same Krylon Fusion that bonds to a PLA dragon will peel off a nylon hinge: you can’t change the chemistry by trying harder.
2. Layer texture and porosity
FDM prints have visible Z-axis layer lines. Resin prints are glass-smooth. Layer lines act like teeth that mechanically grip primer — sometimes a feature (display models with painted weathering), sometimes a bug (props meant to look like injection-molded parts). Resin prints, conversely, are too smooth: the primer needs help adhering, hence the universal “scuff or sand before priming” rule for resin.
3. Wash residue
Resin prints carry uncured monomer that ruins paint adhesion within a coat or two. FDM prints from PEI- or glass-bed printers can carry release agents, glue stick, or 3D Lac. Hand oils transfer during handling. Every print gets washed before primer — this is non-negotiable.

Universal Surface Prep (Do This Before Every Paint Job)
- Wash. Resin: 99% IPA bath for 5 minutes, then post-cure under UV. FDM: warm water, dish soap, soft brush, rinse, air dry. Don’t skip this on FDM prints either — release residue is invisible and kills adhesion.
- Sand or scuff. FDM prints: 220 grit to knock back layer lines, 400 grit for a smooth finish. Resin: 400–600 grit to break the gloss surface. Wear a mask — sanded plastic dust is fine and not great to inhale.
- Wipe clean. Tack cloth or a lint-free rag damp with IPA. Don’t touch the surface again with bare fingers; finger oils transfer.
- Filler prime if needed. Filler primers (Tamiya, Mr. Surfacer 1500) fill micro-layer-lines on FDM prints when you want a smooth-paint finish. Skip if you want layer lines visible as texture.
- Prime. This is where filament type starts to matter — see the breakdown below.
Filament-by-Filament Recommendations
PLA / PLA+
The friendliest filament for paint. High surface energy, takes acrylic primer beautifully, doesn’t react with most solvents. Fine layer lines disappear under one coat of filler primer; deep ones need light sanding first. Almost any acrylic, enamel, or hobby paint will adhere once primed.
Vallejo Surface Primer
Water-based acrylic-polyurethane primer that airbrushes or brushes on, dries flexible, and preserves miniature-scale detail. Kid-safe, cleans up with water, and the de facto standard among miniature painters for a reason.
See on AmazonTamiya Fine Surface Primer (Spray)
Ultra-fine pigment that doesn’t fill in panel lines or rivet detail. The right pick for scale-model-quality finishes on PLA cosplay armor or display models.
See on AmazonKrylon Fusion All-In-One
Bonds directly to PLA without a primer step. Comes in 30+ colors. Right for outdoor PLA props, plastic planters printed in PLA, or anything decorative where preserving fine detail isn’t critical.
See on AmazonPLA+ (toughened PLA — Polymaker, eSun)
Treat identically to PLA. The ”+” formulations have the same surface chemistry; the additives that improve impact strength don’t affect paint adhesion.
PETG
Slightly lower surface energy than PLA, but still paintable with standard acrylic primer after thorough sanding. The catch: PETG is glossier than PLA out of the printer, and primer doesn’t grab as eagerly. Sand more aggressively (220 grit minimum, no skipping the wash) and your topcoat will hold.
Vallejo Surface Primer + acrylic topcoat
Same primer that works for PLA, but apply two thin coats and let each fully cure (24h) before topcoat. PETG that wasn’t sanded is the #1 cause of “my paint peeled” complaints in 3D printing forums.
See on AmazonABS / ASA
ABS welds to itself with acetone, which means acetone-based primers bond chemically (not just mechanically) to the print. ASA behaves the same way and is more UV-stable. Both take a wider range of paints than PLA — including automotive enamels and rattle-can lacquers that would soften PLA.
For decorative finishes, the same hobby primers work. For automotive-grade durability (RC car bodies, cosplay helmets that get worn outdoors), use a plastic-bonding automotive primer like SEM Trim Black or Bulldog Adhesion Promoter, then any 1K or 2K automotive topcoat.
Tamiya Fine Surface Primer
Lacquer-based primer bonds chemically to ABS surfaces, giving an extremely tough base for handling-heavy props and helmets. Pair with Tamiya TS or any automotive 2K topcoat.
See on Amazon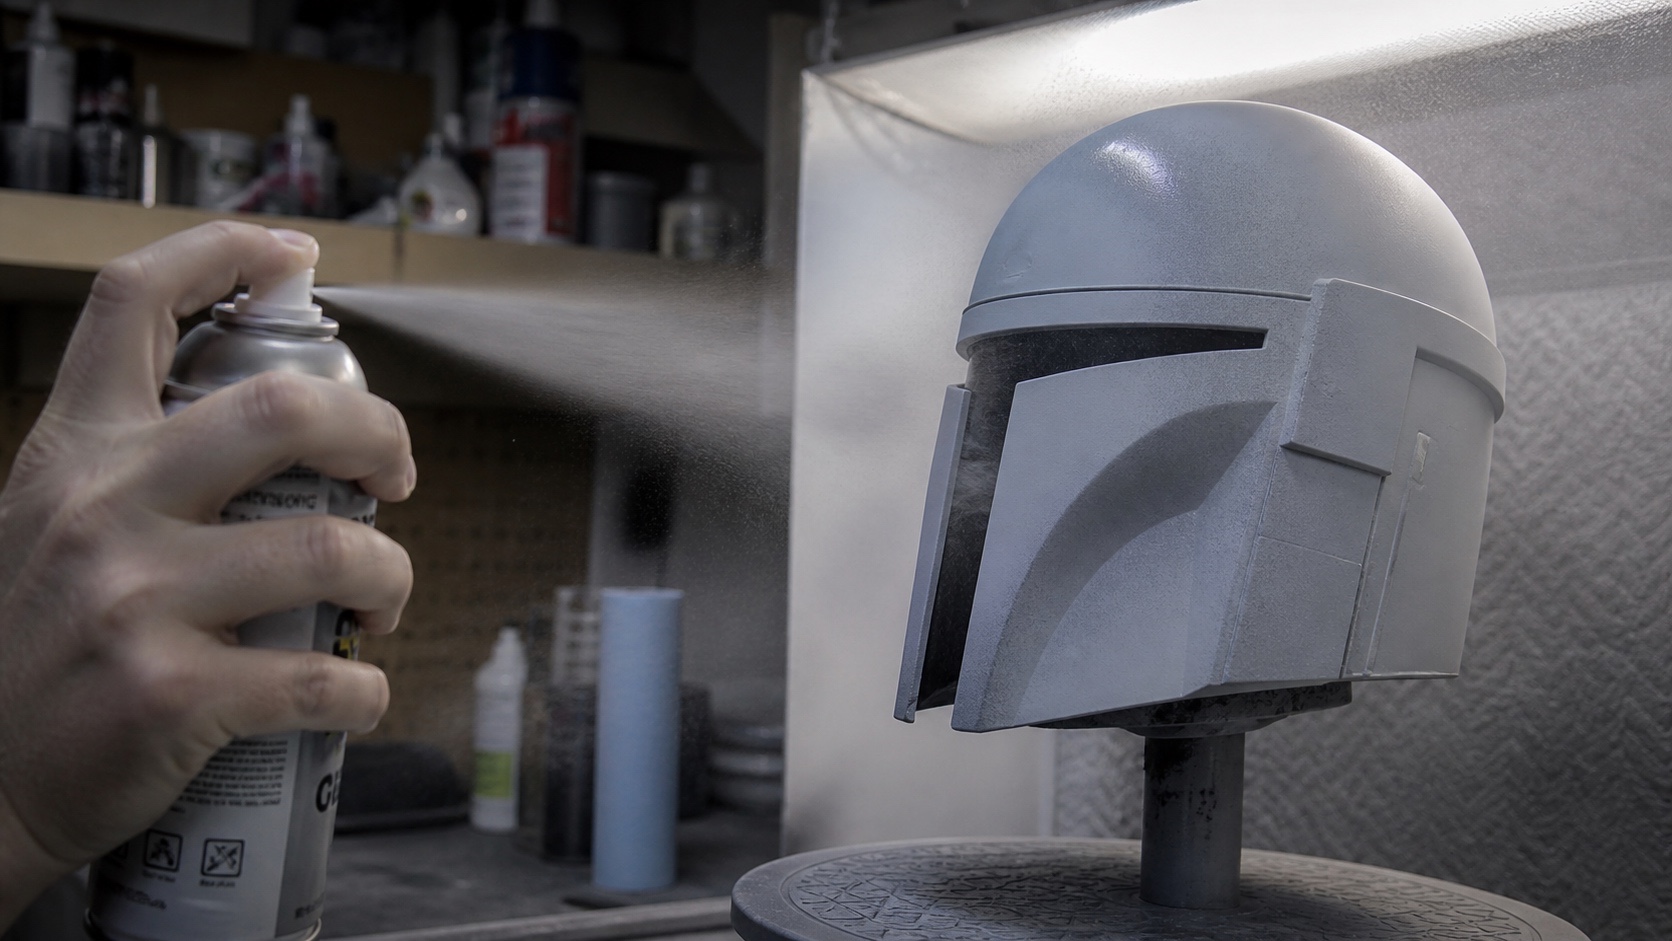
TPU / TPE (Flexible Filaments)
This is where most people give up. TPU flexes; rigid paint cracks; the print looks like a peeling sunburn the moment it bends. The fix is to use a flexible coating designed to move with the substrate.
- Plasti Dip in spray form bonds to TPU and stays flexible. Comes in 20+ colors. Best option for grip surfaces, phone cases, and anything that needs to flex repeatedly.
- Specialty flexible acrylics (Createx Wicked Detail, Angelus Flex Paints, originally for sneaker customizing) work brilliantly on TPU. They cost more but give vibrant color you can’t get from rubber-coatings.
- Avoid: any rigid enamel, any rattle-can hardware-store paint, anything labeled “for plastic” without specifically mentioning flexibility.
Nylon (PA, PA-CF, PA12)
Low surface energy. Standard primers slide right off after curing. Without an adhesion promoter, you’re going to be repainting in three months.
The pro answer: SEM Plastic Adhesion Promoter (rattle-can, automotive supply) or Bulldog Adhesion Promoter. Both are clear coats that chemically modify the plastic surface so subsequent primer can bond. Apply a light coat, wait 30 minutes, then prime as normal. Nylon-CF (carbon-fiber-filled) behaves identically — the carbon fiber doesn’t change paintability.
For functional parts that need to look painted but won’t be handled much, an alternative is dyeing instead of painting — Rit DyeMore (synthetic-fiber dye) penetrates nylon and gives a permanent color that can’t peel. Doesn’t work for white or metallic looks, but for solid blacks, blues, and reds, it’s bulletproof.
Polycarbonate (PC, PC-CF)
Low-to-moderate surface energy and very solvent-sensitive. Acetone, MEK, and many lacquer thinners cloud polycarbonate surfaces (chemical fogging) within seconds. Stick to water-based primers and topcoats.
Same SEM/Bulldog adhesion-promoter approach as nylon, then water-based acrylic primer. Test any rattle-can paint on a scrap before committing — if you see frosting on the test piece, that paint will ruin your print.
Resin (UV-Cured: SLA, MSLA, DLP)
Glass-smooth surface, perfect detail, but every speck of uncured monomer will sabotage paint adhesion. Workflow:
- Wash twice in 99% IPA (5 min each), agitate.
- Post-cure under UV until the surface stops feeling tacky.
- Light scuff with 600 grit on flat surfaces (skip on detailed minis — primer alone bonds fine to fully-cured resin).
- Prime with airbrush primer for detail preservation.
Vallejo Surface Primer (Airbrush)
Brush- or airbrush-on, zero-VOC, dries flexible enough that it won’t crack on dropped minis. Pair with Citadel Contrast or Army Painter Speedpaint for one-coat army-scale painting.
See on AmazonTamiya Fine Surface Primer
The reference standard for scale modelers — finest pigment available, preserves sub-millimeter detail. Use light passes from 8–10 inches away to avoid filling recesses.
See on AmazonPolypropylene (PP)
The hardest filament to paint. Lower surface energy than nylon, even more solvent-resistant. Even adhesion promoters struggle. If you absolutely must paint PP:
- Flame treat or corona-treat the surface (briefly pass a propane torch over the surface from 8 inches — increases surface energy temporarily). This is a real industrial process; consumer-scale flame treatment with care works.
- SEM or Bulldog adhesion promoter immediately after.
- Plastic-specific primer (Krylon Fusion or equivalent).
Honest answer: if the part is going to be painted, don’t print it in PP. Pick PETG or ABS instead and paint that.
Carbon-Fiber Composites (PLA-CF, PETG-CF, PA-CF, PC-CF)
The carbon fiber doesn’t affect paintability — the plastic matrix does. PLA-CF takes paint like PLA. PETG-CF behaves like PETG. PA-CF needs the same adhesion promoter as straight nylon. PC-CF needs the same care as polycarbonate. Match your prep to the matrix material, not the filler.
One catch: CF prints have a distinctive matte texture that some painters love (looks like real carbon fiber composite layups). Heavy filler-priming flattens that texture. Decide on the look before you start priming.
Wood-Fill PLA
The wood fibers in wood-fill PLA absorb water-based stains beautifully — you can stain it like real wood with Varathane or Minwax water stains, then topcoat with polycrylic. This is one of the few filaments where not priming gives a better look. For a painted finish, treat as PLA.
Varathane Premium Fast Dry Wood Stain
Penetrates wood-fill PLA on contact, gives 1-coat color in 1 hour. Topcoat with Minwax Polycrylic for protection without the amber tone of oil poly.
See on AmazonMetal-Fill PLA (Bronze, Copper, Steel)
Metal-fill PLA takes paint identically to plain PLA — but the magic is that you don’t need to paint it. Light sanding with 0000 steel wool exposes real metal at the surface, and a wax topcoat (Renaissance Wax) preserves the patina. Painting over the polished metal effect defeats the point of using the filament.
If you do want to paint over it (sealing only certain areas, antiquing recesses), prime as PLA.
PEEK / PEI / Ultem (Industrial Filaments)
If you’re printing in PEEK, you have access to industrial finishing chemistry that’s outside the scope of this guide. Short version: PEEK requires specialized plasma treatment or industrial primers (3M AP-111, Lord Adhesives) before any topcoat will bond. Consumer hobby paints will not work, even with adhesion promoter. Plan for the finishing process at design time, or leave PEEK parts unpainted.
The Reference Table
| Filament | Wash | Sand | Adhesion Promoter | Primer Recommendation | Best Topcoat | Notes |
|---|---|---|---|---|---|---|
| PLA / PLA+ | Soap + water | 220–400 grit | Not required | Vallejo, Tamiya, or Krylon Fusion (one-step) | Any acrylic, enamel, or hobby paint | Easiest filament to paint |
| PETG | Soap + water | 220 grit (aggressive) | Not required | Vallejo Surface Primer (2 coats) | Acrylic | Sand more than you think |
| ABS / ASA | Soap + water | 220–400 grit | Not required | Tamiya lacquer or auto primer | Auto enamel, lacquer, hobby paint | Solvent-tolerant — broadest paint compatibility |
| TPU / TPE | Soap + water | Light scuff only | Not required | Plasti Dip or flexible acrylic | Flexible coating only | Rigid paint cracks on flex |
| Nylon (PA, PA-CF) | Soap + water | 220 grit | Required (SEM/Bulldog) | Acrylic primer after promoter | Acrylic or auto enamel | Or dye with Rit DyeMore |
| Polycarbonate (PC) | Soap + water | 400 grit | Required | Water-based acrylic only | Water-based topcoat only | Solvents fog the plastic |
| Resin (SLA/MSLA) | 2× IPA + UV cure | 600 grit on flats | Not required | Vallejo (airbrush) or Tamiya (spray) | Acrylic or hobby paint | Wash-and-cure determines adhesion |
| Polypropylene (PP) | Soap + water | 220 grit | Required + flame treat | Krylon Fusion | Flexible only | Reconsider painting at all |
| CF Composites | Match matrix material | Match matrix | Match matrix | Match matrix | Match matrix | Filler doesn’t change rules |
| Wood-Fill PLA | Soap + water | 320 grit | Not required | Skip — stain instead | Polycrylic clear | Stain like real wood |
| Metal-Fill PLA | Soap + water | Steel wool to expose metal | Not required | Renaissance Wax (no paint) | Wax | Polish, don’t paint |
| PEEK / PEI | Industrial process | Plasma treat | Required (industrial) | 3M AP-111 / Lord Adhesives | Industrial only | Out of hobby scope |
Common Mistakes That Ruin Paint Jobs
- Skipping the wash. Even on FDM prints. Five minutes with soap and water saves a peeling repaint six months later.
- Priming over uncured resin. If your resin print still feels tacky after IPA wash, post-cure longer. Tacky monomer eats primer.
- Using rattle-can primer designed for wood/metal on plastic. Read the can. “Plastic-bonding” or “plastic adhesion” needs to be in the name, not just an aspirational icon.
- Painting nylon without adhesion promoter. It looks fine for two weeks. Then it peels.
- Hot solvents on polycarbonate. Test on a scrap or you’ll learn the hard way that “lacquer” and “PC” don’t mix.
- Heavy primer coats on miniatures. Two thin coats always beat one thick coat — thick primer fills the detail you 3D-printed in the first place.
What Sits in the Cabinet
Here’s what a reasonable starter kit looks like, working filament-by-filament:
- One acrylic primer for PLA, PETG, ABS, resin, PC, wood-fill — Vallejo Surface Primer covers all of it.
- One spray primer for fast jobs and detail preservation — Tamiya Fine Surface Primer.
- One adhesion promoter for nylon, PC, PP — SEM or Bulldog brand from any auto-parts store.
- One flexible coating for TPU — Plasti Dip in your color of choice.
- A topcoat range — pick a hobby acrylic line (Vallejo Model Color, Citadel, Army Painter) and stick with it. Ten bottles will cover 90% of projects.
- A wax for metal-fill — Renaissance Wax, one tin lasts forever.
- A water stain for wood-fill — Varathane Fast Dry, one quart per color.
Total cost of the cabinet: under $200. Saves a multiple of that in repainted props and minis.
When to Stop and Start Over
If your first paint coat looks orange-peeled, beaded, or fish-eyed, stop. Don’t keep painting. The print wasn’t washed enough, the primer didn’t bond, or the paint is wrong for the filament. Strip with IPA (acrylic primer) or oven cleaner (lacquer/enamel), wash, sand, and start over with the right system. One do-over costs an evening; one bad finish you ship and later have to fix costs a week.
ThePickSmith participates in the Amazon Associates program. Purchases made through links on this page may earn us a commission at no extra cost to you. Product recommendations are based on independent research and not paid placements.